PSP Development on Windows
Sony’s PlayStation Portable hit Japanese stores in late 2004. Within a year of release, the first code exploits paved the way for a vibrant custom-firmware and homebrew scene, forming a prosthetic that keeps the PSP kicking 15 years later. Running emulators, homebrew games, and game backups is where the PSP really shines.
Running custom code on the PSP has always intrigued me. One byproduct of the PSP hacking community was an unofficial, yet substantial, SDK. It’s an extensive code library and toolchain built in a Linux environment. For those of us who prefer a Windows development environment, this presents a slight annoyance. A Linux virtual machine has always been my go-to here, but this is not a workflow I particularly care for. WSL is certainly an option now, but there’s something I like better in this situation: Docker.
There exists a Docker image containing the PSP toolchain in an isolated environment to compile PSP code within. No need to setup a second system, run a VM, or install the toolchain with WSL. Below I’ve made some notes on using the pspdev-docker image along with an example repository.
Quick Start
Clone the sample repo. The repository has the following directory structure:
| Directory | Description |
|---|---|
/ppsspp |
The PPSSPP emulator. Makes it easy to test without constantly copying to hardware. |
/projects |
A place to put your PSP projects. |
/pspdev-docker |
Contains the pspdev-docker repository used to build the Docker image. |
/pspsdk |
Contains the PSP SDK repository. Included for reference and to provide Intellisense support for Visual Studio. The SDK also has lots of great sample code. |
/references |
A collection of PSP development resources. |
1. Install Docker
Install Docker on your Windows machine. Both the WSL and Hyper-V backends work.
2. Build the Docker image
Navigate to the /pspdev-docker directory and execute the following command to build the Docker image:
docker build -t pspdev-docker .
This will take some time. The Dockerfile is designed to get the necessary dependencies and execute the PSP toolchain script to setup everything. After the image is built, you won’t have to deal with any of this again. And since this is Docker, there shouldn’t be any problems with missing or incompatible dependencies; it should “just work.”
After the image is built, you can optionally dump it to a file for transfer to another PC or backup drive:
docker save pspdev-docker -o pspdev.docker
3. Download PPSSPP
Download PPSSPP and extract it into the /ppsspp directory. As a result, the PPSSPP executable should be located at /ppsspp/PPSSPPWindows.exe.
4. Run the sample project
You can open the sample solution in Visual Studio 2019: /projects/sample/visual-studio/sample.sln. The sample code itself is lifted from the PSP SDK with only minor modification.
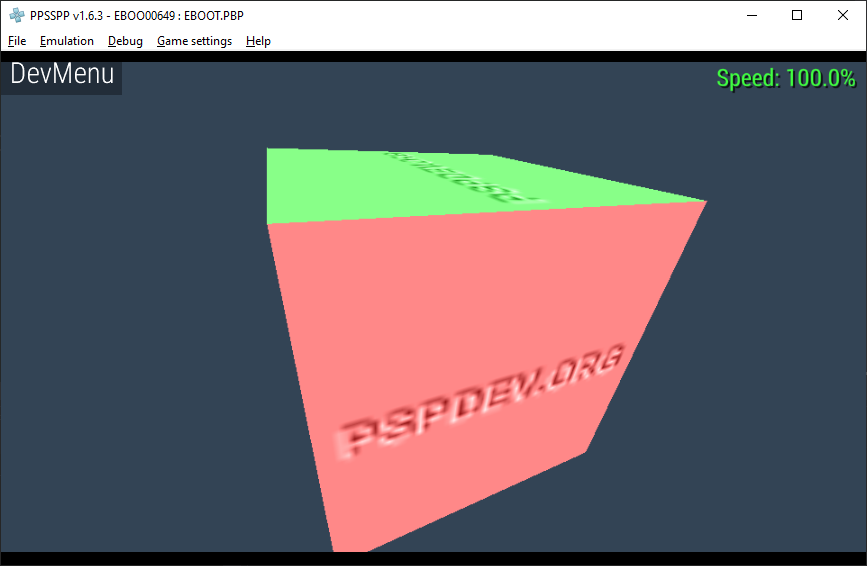
Build and run the sample program. PPSSPP should launch and run the sample automatically.
5. Run on sample on hardware
You can run the sample on actual PSP hardware. You will need a PSP that can run homebrew (i.e., has custom firmware). Copy /game/EBOOT.pbp from your computer to the PSP memory stick: /PSP/GAME/SampleCube/EBOOT.pbp. You will now see a “Cube Sample” game on the PSP.
Building
Let’s discuss how the sample project works, starting with how the code gets compiled. I’ve created three simple batch files that compile the code using the pspdev-docker image.
psp-make.bat
psp-clean.bat
psp-rebuild.bat
When psp-make.bat is executed, it creates a Docker container using the pspdev-docker image, executes the make command within the container, then removes the container when finished. The container uses the makefile in the same directory as the batch file.
After compilation is finished, the batch file copies EBOOT.PBP to the game directory. Any game asset files that need accessed at runtime should be stored in this directory.
Use psp-clean.bat to execute make clean in the container. Similarly use psp-rebuild.bat to execute make rebuild. I’ve noticed a few instances when an incremental build resulted in some weird behavior even though the compile succeeded (i.e., unexpected crashes). A rebuild is often a good place to start debugging - if the issue persists after the rebuild, then proceed to investigate what is wrong with the code.
Makefile
Any source files, libraries, and compiler flags must be specified in the makefile. Adding the source files to the Visual Studio project is just for editing purposes; you’ll have to manually update the makefile.
The sample code in the PSP SDK is a good reference for different options and libraries that are available.
Build.mak
There is a base makefile provided by the PSP SDK. It handles some heavy lifting for us. We define any required variables in our makefile (SDK paths, source files, complier flags, libraries), then include build.mak and let it take over from there.
# Define variables here
PSPSDK=$(shell psp-config --pspsdk-path)
PSPDIR=$(shell psp-config --psp-prefix)
TARGET = my_app
OBJS = src/main.o

# And so on...

# Include base makefile
include $(PSPSDK)/lib/build.mak
There is a copy of the base makefile file in the sample repo at /references/build.mak for quick reference. You can always copy build.mak from the SDK into your project and make changes (if you need different behavior). You can also ignore it and roll your own makefile completely (if you’re insane).
The notes here assume you are using build.mak from the SDK.
Source files
Specify each source file to compile in the OBJS section of the makefile. Instead of the extension .cpp or .c, use .o. The compiler will look for the corresponding source file and generate the compiled object output with the .o extension.
OBJS = src/callbacks.o \
       src/cube.o \
       src/logo.o \
       src/vram.o
You can specify additional include paths using INCDIR. For example, this includes the src directory in the search path for header files:
INCDIR := $(INCDIR) . src
Compiler flags
I am not well versed in gcc, so I can’t expound much on compiler flags. You can Bing it instead. I’ll note two things I found handy.
C11 compiler mode
-std=c11
This tells the compiler to use the C11 standard.
Preprocessor definitions
-DMY_COMPILER_FLAG
This defines MY_COMPILER_FLAG. It is prefixed with D in the makefile; that is not a typo. These come in handy when you want different build paths for sections of code or configuration (for example, a PSP build and a Windows build). Some libraries may also have configuration options you wish to set with preprocessor definitions.
Libraries
Including static libraries in your build is done in the LIBS part of the makefile. I usually reference the PSP SDK samples to know which libraries to include for certain functionality in the SDK.
If you have libraries outside the SDK you want to use, you can update the library search path. For example:
LIBDIR := $(LIBDIR) . src/thirdparty/lua/psp-5.3.4/lib
LIBS = -llua <other libs as needed>
VFPU
For 3D graphics you’ll want to use the vfpu versions of the graphics libraries. This utilizes the PSP’s vector co-processor. Any thread you want to use this on will need created with the THREAD_ATTR_VFPU attribute. This is accomplished using a macro from the PSP SDK:
// This goes in your code, not the makefile. See sample project for example.
PSP_MAIN_THREAD_ATTR(THREAD_ATTR_USER|THREAD_ATTR_VFPU);
See The Naked PSP presentation in the references folder for more details on the VFPU.
Visual Studio
The sample repository includes a Visual Studio solution as an example of using Visual Studio to develop your PSP game. Visual Studio is not required; you can use whatever IDE or text editor you prefer.
Visual Studio support is not perfect - it will show errors in places there are none. But for the most part Intellisense picks up the PSP SDK functions and types just fine. Below are some notes on how the sample project is setup.
Project directory structure
The sample project is setup with the following directory structure:
| Directory | Description |
|---|---|
\build |
Build output and intermediate files (for Visual Studio). |
\game |
Game directory; contains assets and output binaries. |
\src |
Source code. |
\visual-studio |
Visual Studio solution and projects. |
General configuration
The project is an empty Visual Studio project with the Configuration Type set to Makefile.
Configuration Type:
Makefile

Output Directory:
$(SolutionDir)..\build\$(MSBuildProjectName)\$(Platform)\$(Configuration)\

Immediate Directory:
$(SolutionDir)..\build\$(MSBuildProjectName)\$(Platform)\$(Configuration)\
For the sample, the output directories are not critical since we only have a PSP project - the EBOOT.PBP is generated by the Docker container.

Build configuration
The NMake property section tells Visual Studio what commands to use when building the project. We want to use batch files to invoke the pspdev-docker container. When building in Visual Studio, view the Output log to see the build status, including warnings and errors.
Build Command Line:
$(SolutionDir)..\psp-make.bat

Rebuild All Command Line:
$(SolutionDir)..\psp-rebuild.bat

Clean Command Line:
$(SolutionDir)..\psp-clean.bat
The preprocessor definitions and include search paths are used for Intellisense.
Preprocessor Definitions:
<Set as needed per build configuration/platform>

Include Search Path:
$(SolutionDir)..\src;$(SolutionDIr)..\..\..\pspsdk\src\;$(SolutionDIr)..\..\..\pspsdk\src\atrac3;$(SolutionDIr)..\..\..\pspsdk\src\audio;$(SolutionDIr)..\..\..\pspsdk\src\base;$(SolutionDIr)..\..\..\pspsdk\src\ctrl;$(SolutionDIr)..\..\..\pspsdk\src\debug;$(SolutionDIr)..\..\..\pspsdk\src\display;$(SolutionDIr)..\..\..\pspsdk\src\fpu;$(SolutionDIr)..\..\..\pspsdk\src\ge;$(SolutionDIr)..\..\..\pspsdk\src\gu;$(SolutionDIr)..\..\..\pspsdk\src\gum;$(SolutionDIr)..\..\..\pspsdk\src\hprm;$(SolutionDIr)..\..\..\pspsdk\src\kernel;$(SolutionDIr)..\..\..\pspsdk\src\libc;$(SolutionDIr)..\..\..\pspsdk\src\mp3;$(SolutionDIr)..\..\..\pspsdk\src\mpeg;$(SolutionDIr)..\..\..\pspsdk\src\nand;$(SolutionDIr)..\..\..\pspsdk\src\net;$(SolutionDIr)..\..\..\pspsdk\src\openpsid;$(SolutionDIr)..\..\..\pspsdk\src\power;$(SolutionDIr)..\..\..\pspsdk\src\prof;$(SolutionDIr)..\..\..\pspsdk\src\registry;$(SolutionDIr)..\..\..\pspsdk\src\rtc;$(SolutionDIr)..\..\..\pspsdk\src\sdk;$(SolutionDIr)..\..\..\pspsdk\src\sircs;$(SolutionDIr)..\..\..\pspsdk\src\startup;$(SolutionDIr)..\..\..\pspsdk\src\umd;$(SolutionDIr)..\..\..\pspsdk\src\usb;$(SolutionDIr)..\..\..\pspsdk\src\usbstor;$(SolutionDIr)..\..\..\pspsdk\src\user;$(SolutionDIr)..\..\..\pspsdk\src\utility;$(SolutionDIr)..\..\..\pspsdk\src\vfpu;$(SolutionDIr)..\..\..\pspsdk\src\video;$(SolutionDIr)..\..\..\pspsdk\src\vsh;$(SolutionDIr)..\..\..\pspsdk\src\wlan;$(NMakeIncludeSearchPath)
Debugging configuration
If you use the project property dialog in Visual Studio to edit the debugging settings, it will store the values in the *.vcxproj.user file. Typically this file is not stored in version control, which means each user must set their own debugging options. For convenience, you can set default debugging options manually in the *.vcxproj file.
The following property group sets default debugging settings. It must be placed somewhere after <Import Project="$(VCTargetsPath)\Microsoft.Cpp.props" /> in the project file.
<PropertyGroup>
  <LocalDebuggerCommand>$(SolutionDir)../../../ppsspp/PPSSPPWindows64.exe</LocalDebuggerCommand>
  <LocalDebuggerCommandArguments>$(SolutionDir)../game/EBOOT.PBP</LocalDebuggerCommandArguments>
  <LocalDebuggerWorkingDirectory>$(SolutionDir)../../../ppsspp/</LocalDebuggerWorkingDirectory>
  <DebuggerFlavor>WindowsLocalDebugger</DebuggerFlavor>
</PropertyGroup>
When you debug an instance of the project, the PPSSPP emulator is launched using the freshly built EBOOT.PBP.
References
I’ve included some development resources in the sample repository that I found useful. They are included for preservation purposes and credit goes to the original authors.
- The Naked PSP presentation notes by TyRaNiD is included in PDF form. It is an excellent deep dive on the PSP internals and software toolchain.
- The Ghoti.nl tutorials are great practical PSP programming tutorials. I’ve resurrected as much as a could through archive.org.
Here are some additional links:
Conclusion
This article documents a PSP development workflow on Windows, but does not provide anything in terms of actually programming a game. The development references will definitely help in this regard. On that note, I have been working on a more substantial sample game, experimenting with things like game engine design and platform abstraction (having both a PSP and Windows build of the game for easier debugging and development). The source can be found on GitHub (still very work-in-progress).
In the meantime, hopefully this write-up provides a jump-start for someone wanting to build some homebrew. It can be a challenging, yet rewarding learning experience. Have fun writing code for the PSP!